Why do you take Photographs? I’ve asked this question many times to colleagues, friends, on forums, online communities and polls on my website. The answers are as varied as the people who took the time to answer, but the majority said it was artistic expression – in other words, to communicate a feeling, a meaning, an emotion or a mood to another person.
Photography is a visual language, we use light interacting with various subjects to communicate. At night we have all the ingredients to create powerful and meaningful images. With a blue sky during the day it is easy to forget we live on a planet flying through space at an absurd 30 kilometers per second. At night we have the stars around us to make us consider our place in the Universe.
Visualization in the Dark
Practical Considerations
We have already seen that the lunar month is split into a Dark Half and a Light Half, weeks 1 and 4 are darker, weeks 2 & 3 offer the
most available night light to shoot by. On all but the brightest nights it can be quite tough with the naked eye to see what you are trying to photograph, let alone visualise some final image from it.
Once again, the High ISO Test shot comes to the rescue. A quick 30 second exposure can give you a good indication of your final composition. The key things to really look out for at this stage are.
If you spend some time to study the work of your favorite landscape photographers, you may be surprised to find how many of the
images that resonate with you are actually quite simple compositions. There is certainly no need to fill the frame with action.
Seeing the Unseen
This is the real Art of Visualization at Night, seeing the unseen, having to imagine how the final shot will look after ten minutes, or even one or two hours of exposure.
The way the stars will move through the frame in the exposure, if Polaris, the north star is in the frame, where is it centered, how high in the sky is it, how does that swirling star trail counterpoint to the foreground elements, is it balanced?
All these things need careful thought and the ability to visualize the final image does take time and experience to master.
With shots containing moving water, it is fair to say that any exposures of more than a minute will render the water completely smooth and misty creating a very ethereal look.

The night this image was taken the Atlantic Ocean was pounding these sea stacks with huge waves. In the time it took to record this exposure the sea had been rendered to a smooth mystical glow. Thelight from quite a small moon was enough to expose the cliffs well, but still retaining some shadows to add depth and that half light feel.
Subjects
Every photography ever taken is a photograph of something, a “what” – a subject. It would be fair to say the majority of night images feature the stars, but anything you choose to shoot in daylight can be a subject at night also, given sufficient Available Light. It is true that we are using more prolonged exposures and using time as an abstracting element, but our images are only limited by our own imaginations – its time to stretch that creative muscle.
Stars as Subjects
There are people who specialize in Astro Photography, which is the discipline of shooting star fields, constellations and other celestial bodies. For this book we are only looking at Stars as Subjects in the context of a Landscape, but there are many considerations, important for compositions and expression.
Static or Streaking
Whether you are aiming for a composition with the stars as static points or one in which the stars are creating trails is down to your own intention and available light.

Sichuan, China, Week 1 – 50% Moon @ 21:05pm – Nikon D3x 24-70/2.8 @ 29mm – Single Exposure 30s @ f4 ISO 2000
In this image, the leading line of the river and the snowy mountain in the distance carry the eye through the frame – the sharp stars add an element of incongruity to this well-lit night scene.
Had I taken this as a stacked star trail image and filled the sky with swirling circles, would the composition remain balanced, would it be too much?
Deciding on when to have trails and when to have static stars is an important point in the personal development of each photographer.
First and foremost, our compositions should make visual sense.
Once you decide to commit to a longer exposure and star trails your mind must begin to work on visualization process of how the trails are going to interact with the other elements in the frame, and the frame itself.
Failure to do so will result in impressive images that will usually fail to more prolonged scrutiny.
There are many factors to consider in placement of the star trails, and we will study these in the next few pages.
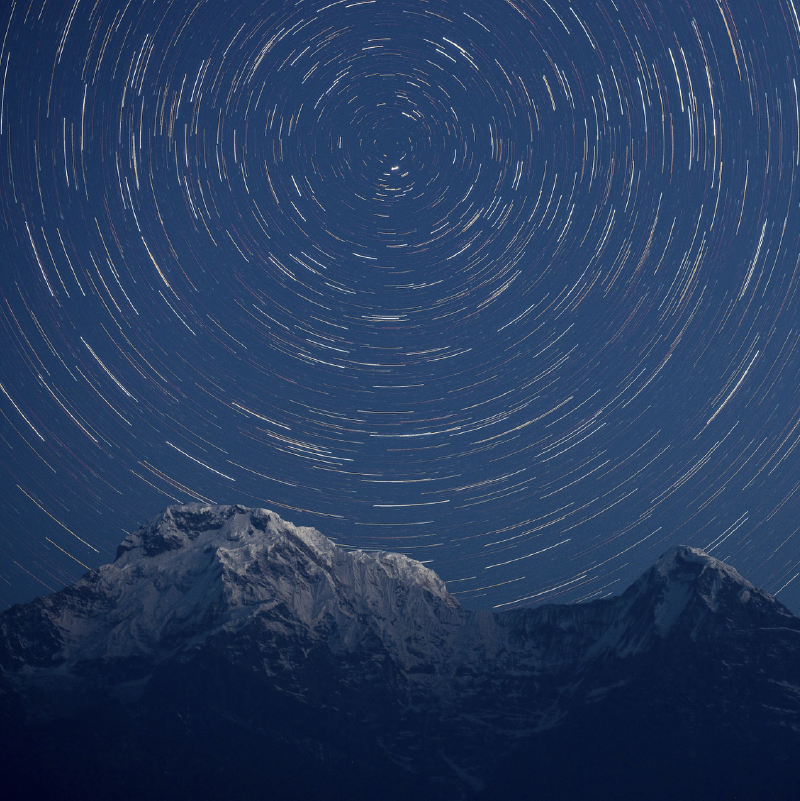
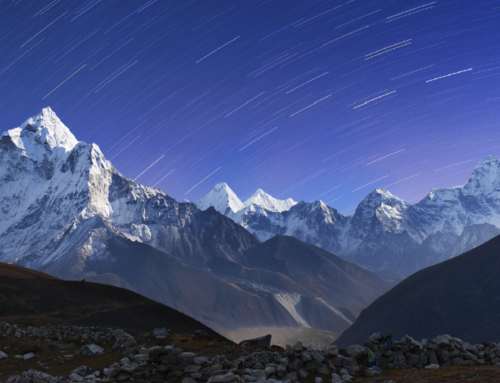
Annapurna, Nepal, Week 1 – 39.2% Moon @ 21:05pm Nikon D3x 24-70/2.8 @ 58mm -Multiple Exposures 20 x 180s @ f4 ISO 400
In the image above, which is the most dominant subject, the mountains or the concentric star trails?
Shooting the Moon
Taking any image of the moon where it is big enough in the frame to view any detail requires a lot of focal length, using a 500 or
600mm lens, usually with a 1.4 or even 2x convertor, and often both!
A sturdy tripod, mirror lock up and a cable release to reduce vibrations to a minimum. The moon is moving all the time, and you need a faster shutter speed to freeze its motion. At least 1/60 or even 1/125 – 1/250 if possible. But for this book, I want to focus on getting images of the moon in the context of a landscape, and really, that is more of a challenge.
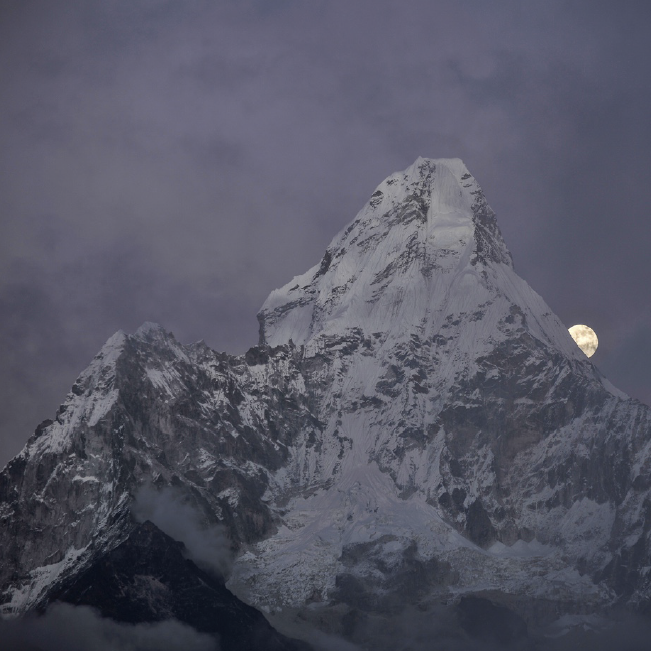
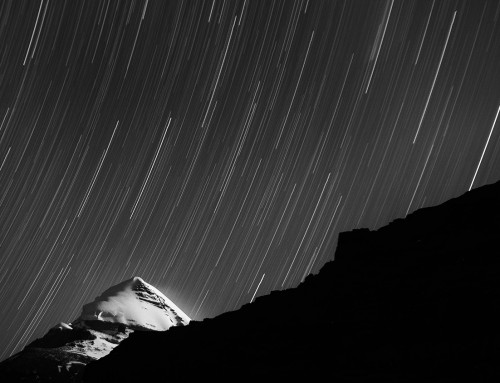
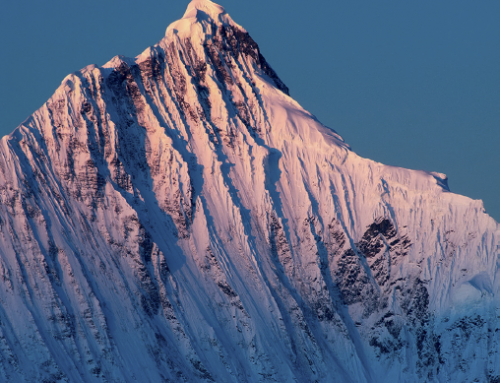
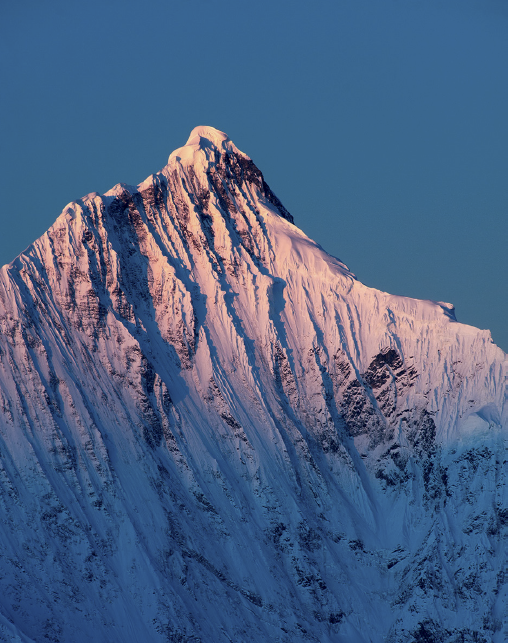
Ama Dablam, Nepal, Week 2 – 100% Moon @ 19:16pm Nikon D3x 70-300 @ 145mm- Single Exposure 1/30 @ f5.6 ISO 100
At Twilight
The visible moon is always relative to sunrise and sunset times. New Moons always rise around sunrise, and Full Moons always rise around sunset and set around sunrise. The image on the previous page was taken at sunset, which provided enough lingering light to balance the exposure with the rising moon, and give some nice purple tones to the sky.
There is really only one day a month when it is possible to see a full moon rising or setting in the landscape with enough light from the rising or setting sun to balance a good exposure. The day of full moon is the one you want to be out on.

On other days of the month, the moon will still be in the sky at various times of the day and night and in various phases, and many of them allowing for good images to be made.
At Night
Having the moon in the frame at night opens up some excellent opportunities, either on crystal clear nights, or when scattered clouds sweep across the sky.
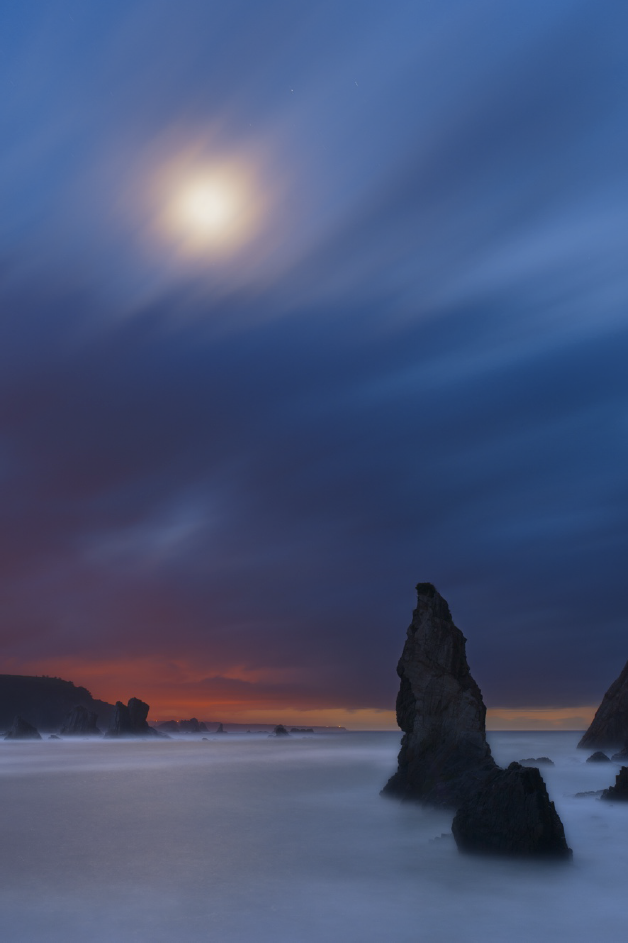
Asturias, Spain, Week 2 – 21% Moon @ 21.21pm Nikon D3x 24-70/2.8 @28mm – Single Exposure -moon in frame – 121s @ f5 ISO 80
Even a small amount of moonlight will backlight clouds to great effect. As we’ve said before, night light is diverse and offers massive opportunities to those who venture out.
There are no practical difficulties to be concerned about, the moon will blow out completely in anything over a fraction of a second exposure, but rendering it small in the frame with a wide angled lens makes that point a minor one.

With a wide-angled lens it is also possible to shoot the moon rising or setting creating a super bright trail. These too can be very impressive. Shooting images with the moon in the frame has the benefit of showing the light source, which can add a lot of depth to your night images.
Direction
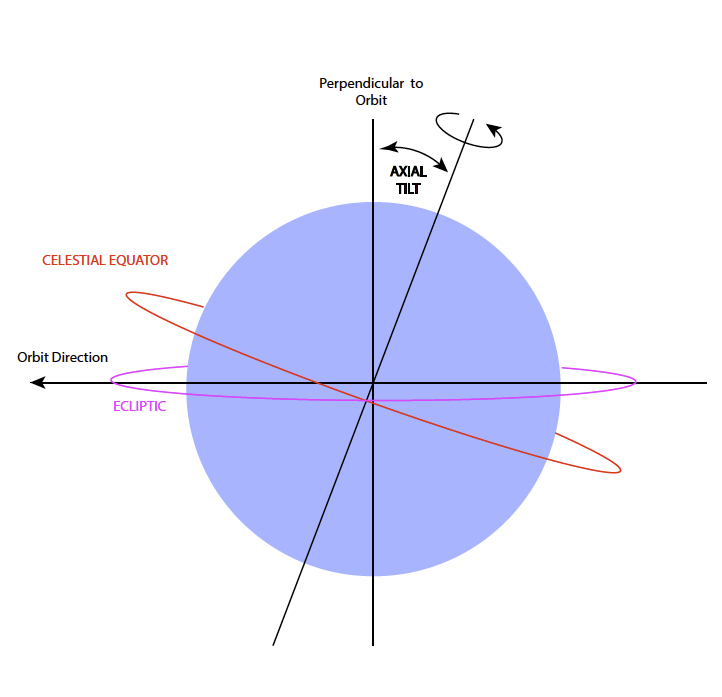
As we all know, the Earth is an oblate ellipsoid, a squashed circle rather than a perfect sphere. Its axis is also not straight up and down, the axial tilt varies between 22.1° and 24.5°. It was actually the meteoric collision that broke off our moon that caused this misalignment, and this wobble contributes greatly to our seasons and turbulent weather.
The night sky looks quite different from where on the surface you are observing it from and in what direction you are looking. The axis roughly points towards Polaris, the North Star, and we’ll cover how to find that shortly, but for now, we need to consider how the stars will appear to move during our exposures depending on the direction we are shooting, and our latitude.
What is Latitude?
If you are standing on the Equator, your Latitude is 0° and if you are on the North Pole it is 90°N. Every point in between is measured by the same definition. Every point on Earth can be defined by its Latitude, which is either North (N) or South (S) of the Equator, and Longitude, either East (E) or West (W) of Greenwich Meridian in London, UK.
For Night Photography, our Longitude is of little importance, but our Latitude has a great amount of influence on our compositions.
Every degree of Latitude will create different compositions of Star Trails even if taken facing the same direction and this is due to the elevation of the North Star in the sky and your point relative to the Celestial Equator.
We will be looking at how the stars will appear to trail from various points of Earth looking in various directions; North, South, East and West. It is clear there is more to think about when composing star trails than is immediately apparent. But, this attention to details should help to elevate your work to a far higher standard.
North
Because the earth’s axis roughly points towards the North Star, Polaris, shots taken in this direction are typified by concentric star trails radiating out from a static point in the sky. Stars close to Polaris appear to hardly move at all in a given exposure, while the further out you get, the more they rotate.
From the North Pole, Polaris is directly above you, 90° vertical.
Conversely, when you are at the Equator, Polaris lies on the horizon. As you move north, Polaris gets higher in the sky. In fact the altitude of Polaris in the sky can be used to determine your Latitude. If you are at 55N, then Polaris will be located 55° up in the sky. As you move north from the Equator, Polaris will appear higher and higher in the sky in accordance with your latitude.
South
There is no Southern Hemisphere equivalent of Polaris, but the stars still appear to rotate about a virtual pole. Exactly the same phenomenon is viewable from south of the Equator; the virtual Pole will rise in the sky as you head south.
East & West
This is where it gets fun!
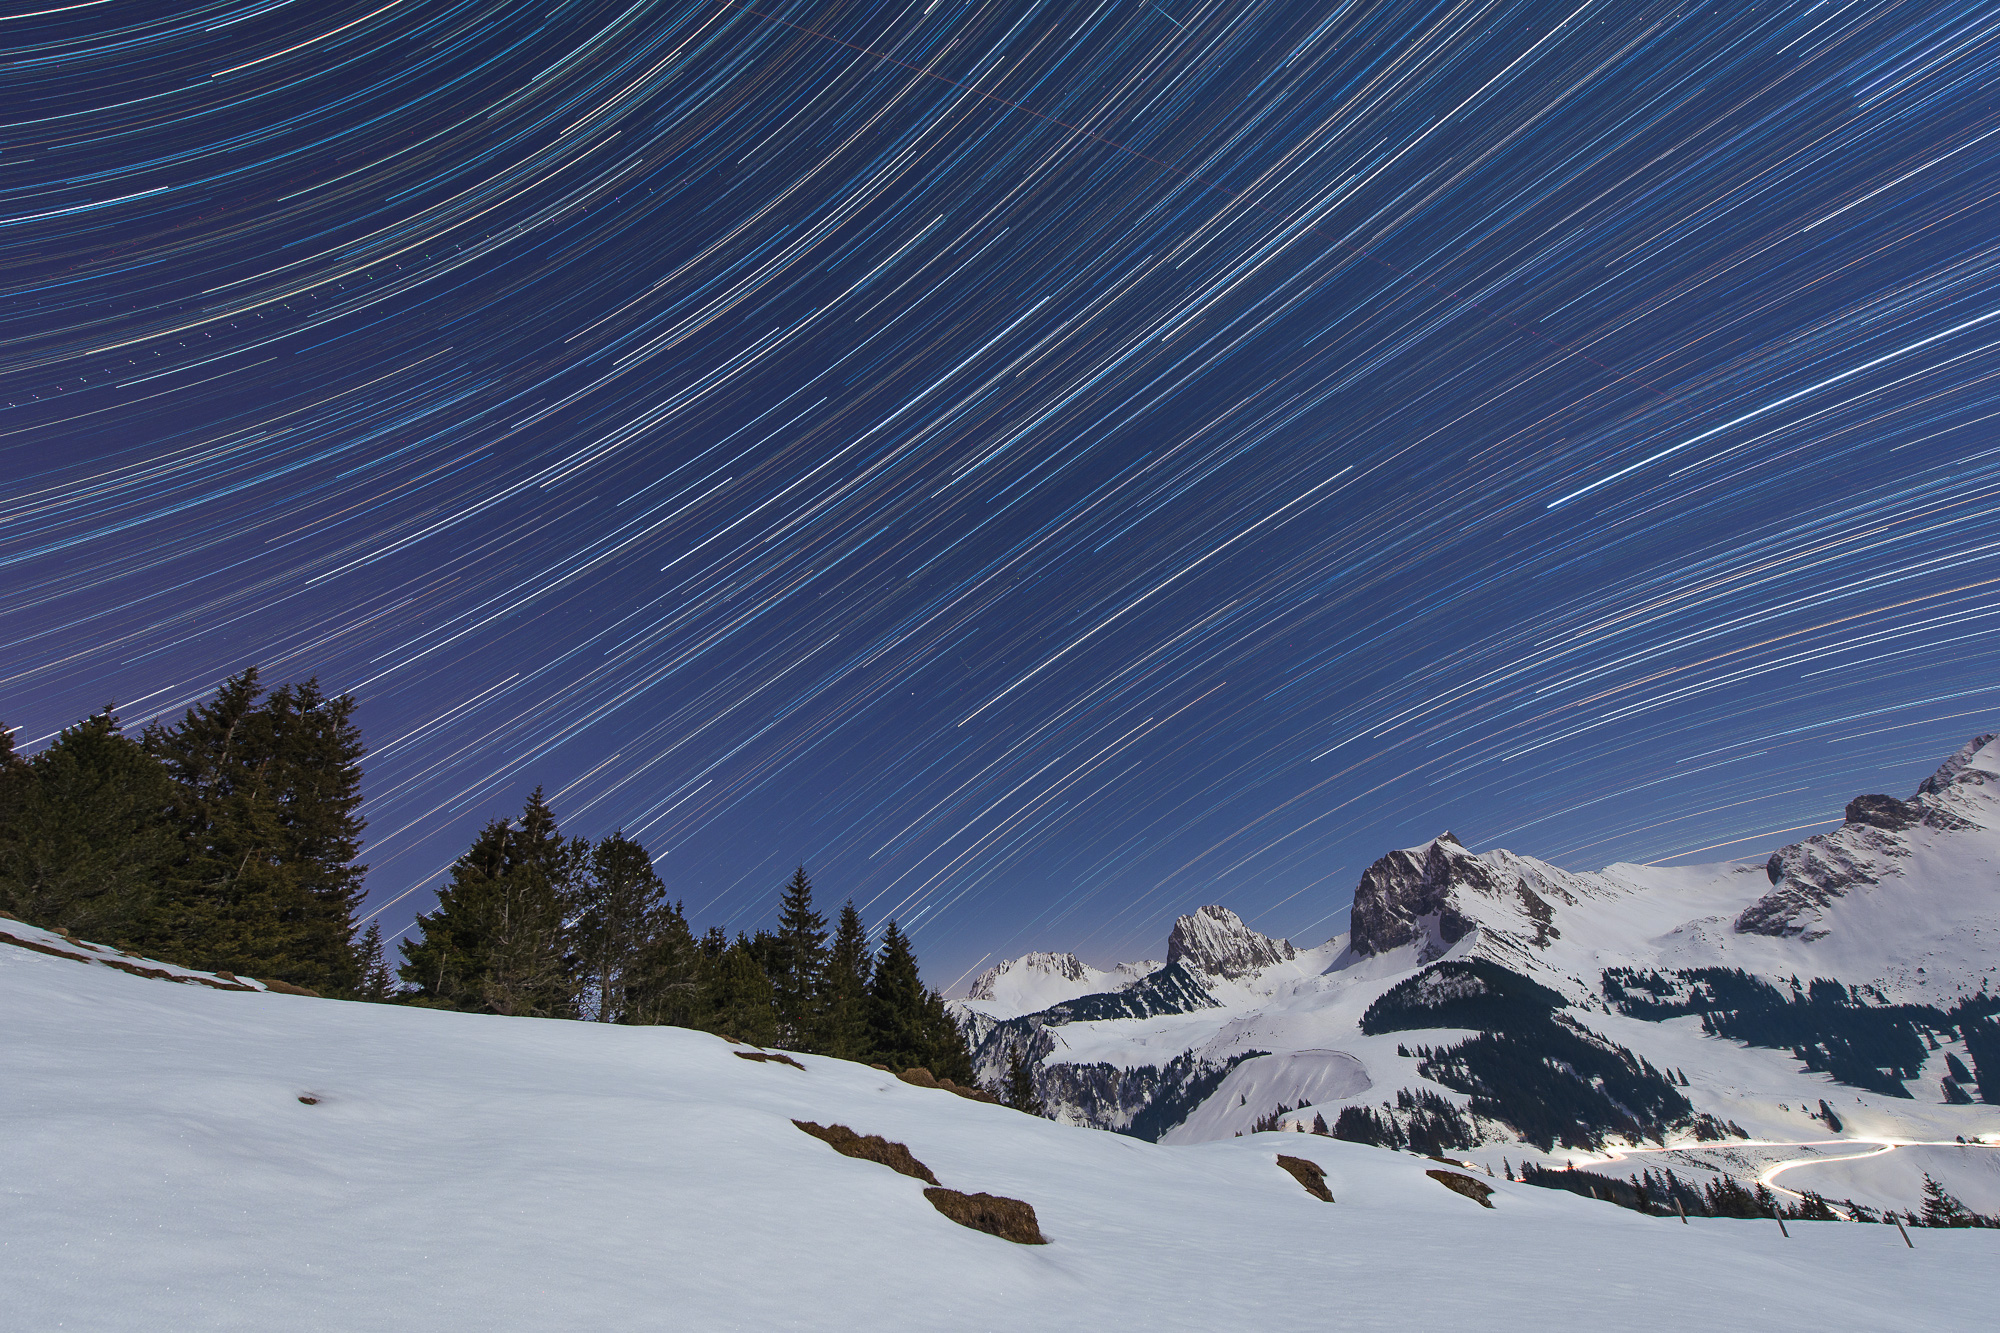
And best illustrated by the image which was taken in Switzerland looking east. As the earth rotates, the stars appear to rotate around Both Poles, not just the north. In this image you can see the stars curving in both directions, because we are facing the Celestial Equator and are therefore seeing the rotation around both poles.
On the Equator, when looking East or West, the stars will appear to rotate equally around both poles and fall almost vertically toward the horizon in the middle. Again, as you move to the poles, the rotation will appear to be dominant in that hemisphere, but none the less, you will still witness this dual rotation, until you reach the North or South Pole and then you cannot see the other hemispheres influence any more. From a compositional consideration, it should be clear that the virtual paths of the stars should be estimated before final arrangement of the elements has occurred.
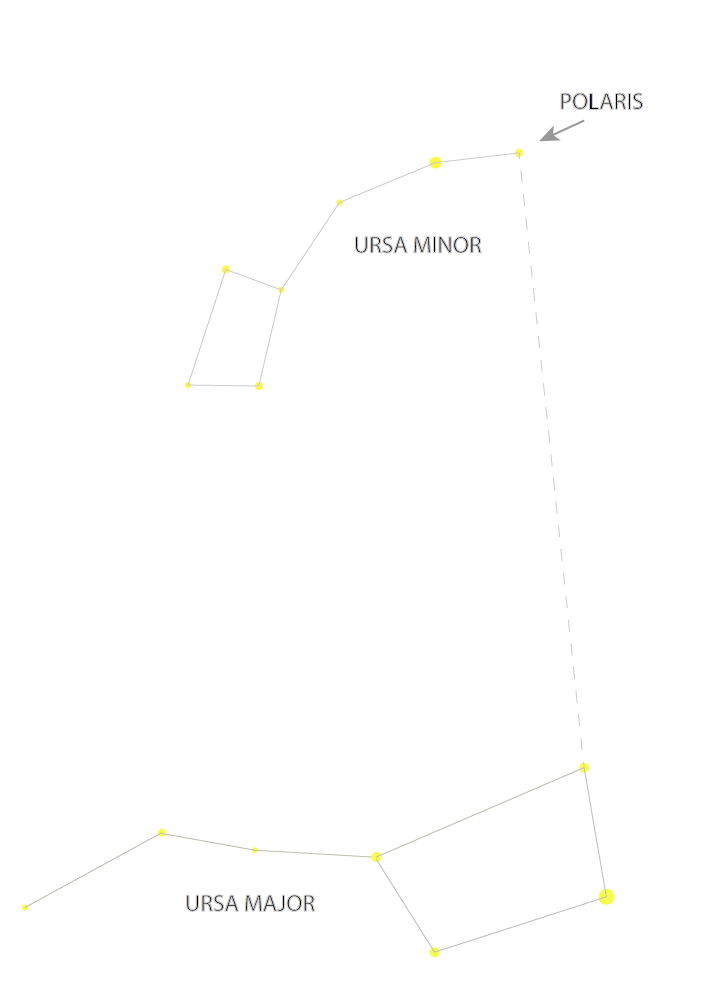
Finding Polaris
The easiest way is to find the Constellation Ursa Major (The Big Dipper) and align the North Star that way as illustrated below. This is a reliable method assuming the Big Dipper is actually visible in the night sky. I have been out often when it is below the horizon, and you have to fall back on a couple of other methods.
With a Compass If you’re out in the wild it’s a good idea to carry a map and compass with you anyway, and knowing which way is north certainly is a start in your search for the North Star.
If Ursa Major is not visible, I start by finding north on the compass. Then, set up the camera on a tripod and a wide lens to get a lot of the sky in the frame. Focus at infinity on the moon and take a 2 minute exposure @ f4 ISO 400 (If it is Astro Dark). The rotation of the stars will be visible in this time, and you can usually find which star is Polaris simply because all the others appear to be rotating around it.
Related Article:
focusing at night – Link
Exposing at Night – Link