Develop Module – Basic Tools
Adobe Lightroom is an incredibly powerful Raw Development Tool – allowing a huge range of non-destructive adjustments.
Being able to make an adjustment, review it and undo it without affecting the raw file allows for infinite experimentation and discovery.
![]()
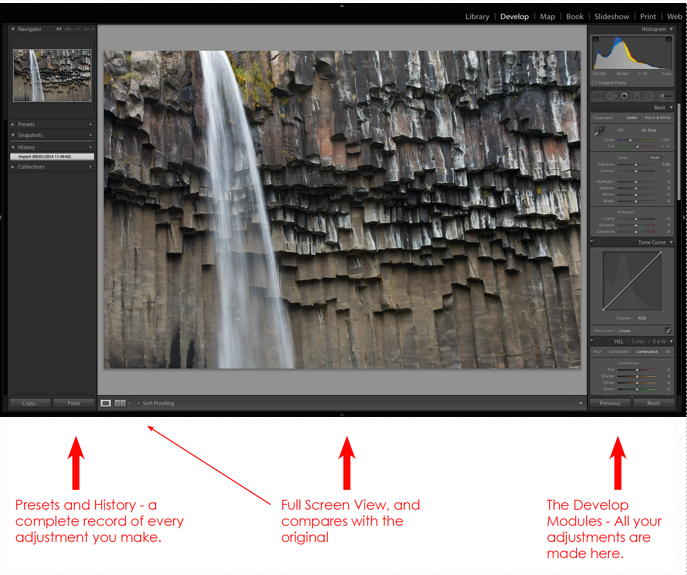
The Develop Module in Lightroom is accessed via the top menu shown above and all the tool palettes are located in the right side bar.
This article we will introduce basic adjustment tools – sensor remover, histogram, crop, white balance, exposure, contrast, highlights, shadows, blacks, whites, clarity, vibrance, saturation, the tone curves
You can watch related video at the botoom of the page.

Sensor Spot Removal – Probably the biggest downside of shooting digitally is the accumulation of dust (spots) on the image sensor.
Causes of Sensor Spot: Changing lenses frequently in dusty conditions – lets dust into the camera body.
shooting at small apertures – spots are way more obvious between f16-f22.
Lightroom comes with a very competent spot removal system – located below the Histogram in the Develop Module. The controls are simple – We use Heal by default and only use Clone if we need to specify a source for the repair. 100% opacity would be the logical default!
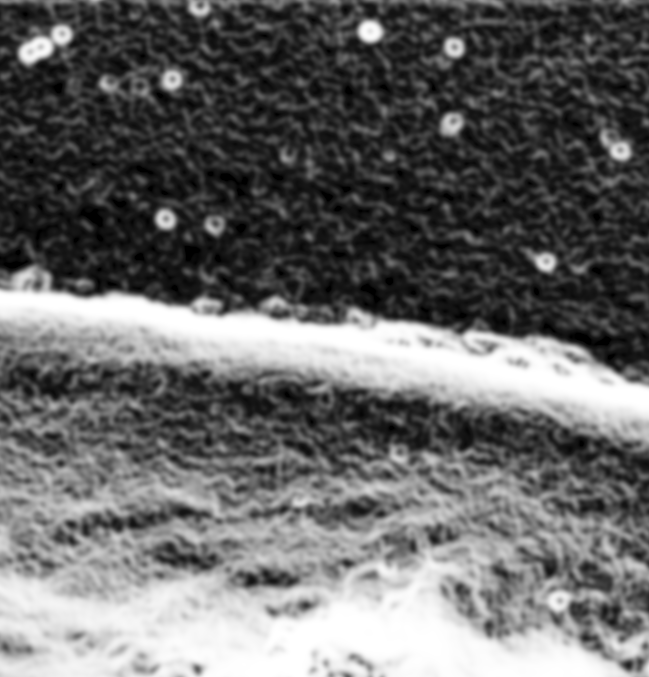
The Mask Function (located below the image in the lower left corner of the screen – allows for a mask overlay to be seen that can (in some cases) make seeing the spots easier. Below, the spots can be seen as circles in the masked image.

The Histogram – All that needs to be said is that this is a live Histogram and will show the graphical changes of any adjustments you make in the Develop Panel.
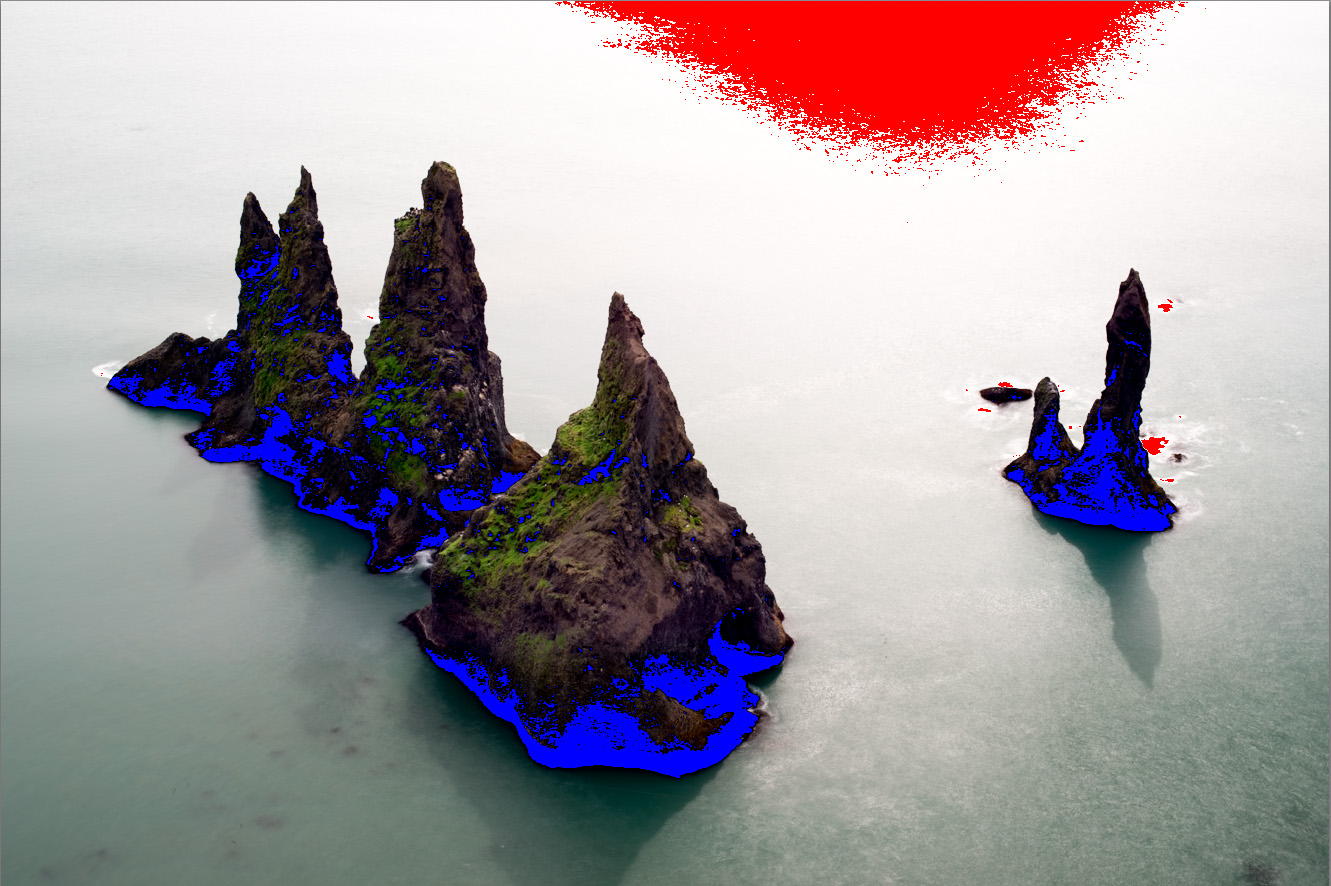
The two triangles in the top right and top left corners are Clipping Indicators – once checked they will show any shadows or highlights that are clipped – that is , either pure black or pure white with no detail.
The red areas are showing clipped highlights and the blue areas show clipped shadows. Turn them off and on by pressing the J key on your keyboard.

Cropping – Moving below the Histogram we encounter a bar with a number of Tabs, the first of which is the cropping panel. Most DSLR’s shoot natively in a 3:2 ratio, but we are not limited creatively by that. We can choose to crop in any number of rations, from 4:5, 3:1, 1:1 or anything else we may desire.
We would advocate always cropping to some form of standard ratio rather than random per image crops. A portfolio of images of random dimensions can look sloppy, whereas a series of squares or 4:5’s together can look very elegant.
The power in the Basic Panel is incredible and a few adjustments can make huge impact on our images. The essential adjustment tools are as follows:
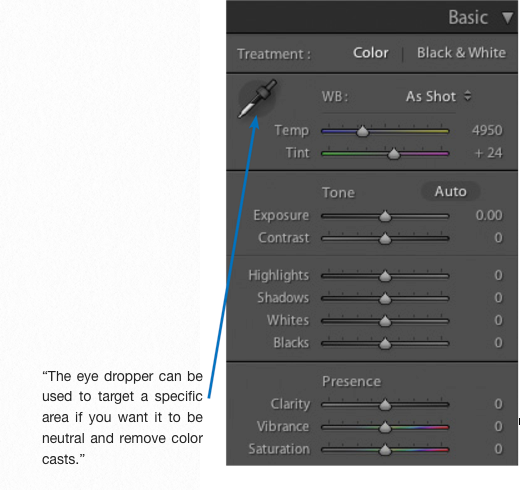
White Balance – Rather than getting hung up in the field worrying about white balance, it can be changed and fine tuned in RAW Development. Many photographers habitually shoot in the Daylight WB setting in camera and correct it manually in Lightroom.
Exposure – The exposure slider here has a range of +/- 5 stops and offers a huge range of possibilities. The slider targets the exposure of the mid tones.
“Underexpose in camera creates noise and ill-defined shadows. Expose to the right in camera, avoid clipping the highlights and darkening in Lightroom produces a far cleaner file.”
Contrast – Contrast is defined as the difference between the brightest and darkest areas of the image. Increasing contrast brightens the lighter areas while darkening the darker areas.
Using this method makes the changes globally to the entire image and should be used with sensitivity.
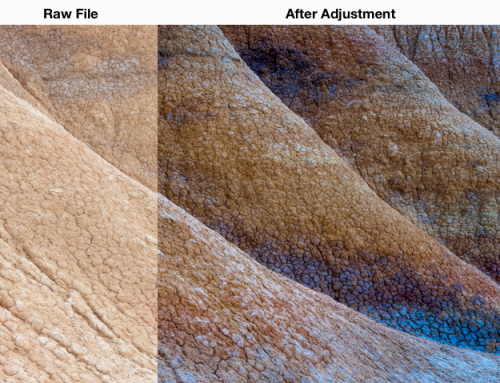
Highlights, Shadows, Whites & Blacks -These sliders offer a great amount of control of the image, each targeting one of four specific sections of the image. As can be seen in the following illustration.

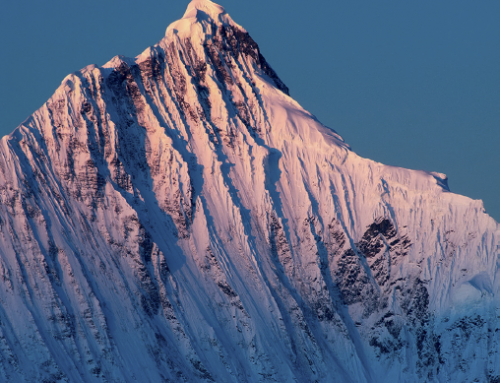
The original RAW file shown here on the right is very low contrast (as is evident from the narrow histogram showing mainly dark mid tones).
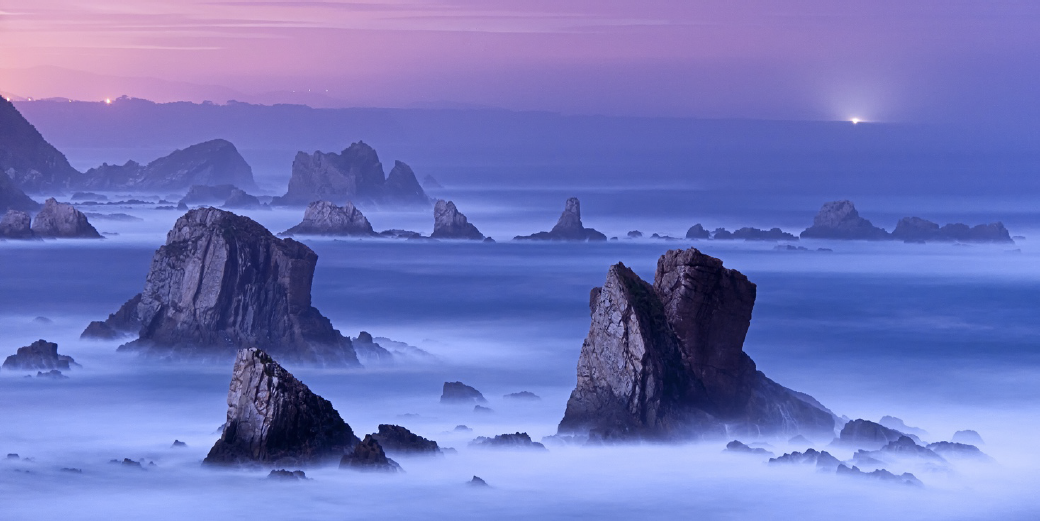
 By using the sliders mentioned so far to adjust exposure, darken blacks & shadows and lighten whites and highlights, a drastic affect is achieved, creating plenty of contrast and boosting colors.

Clarity, Vibrance & Saturation
Clarity affects mainly mid tones and works by adding or reducing micro contrast – it can be considered as a details slider.
Vibrance affects the intensity of more muted colors while leaving already saturated colors unaffected.
Saturation uniformly affects the intensity of colors
The Tone Curve – An intuitive and accurate way to shape the distribution of tones in an image, especially when used in conjunction with the sliders covered on the previous pages.
The most simple and well-known adjustment is the creation of an S-curve, as shown below.
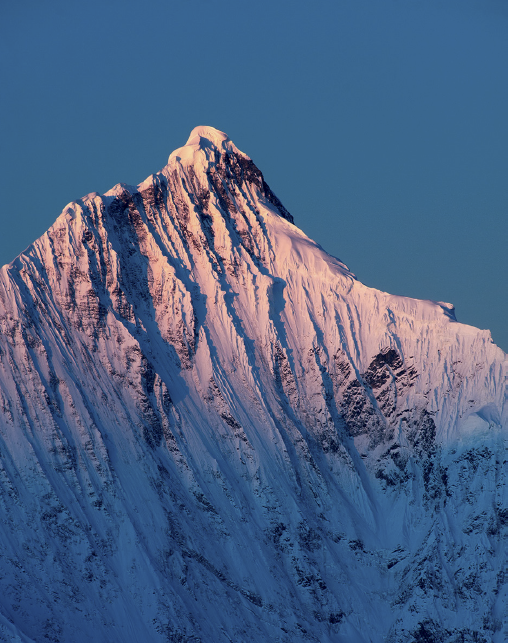
Increasing Clarity, Vibrance & Saturation adds pop and micro contrast. The s-curve adds more contrast to the mid tones.
Finally some selective saturation adjustment to the Reds, Oranges and Yellows pops these colors further than the global adjustment earlier.

Adjustments such as those shown so far are the starting point for image processing and can be achieved in just a few seconds.
The Histogram inserts tell a compelling story with darker darks, brighter whites and an image containing a great deal more dynamic range.