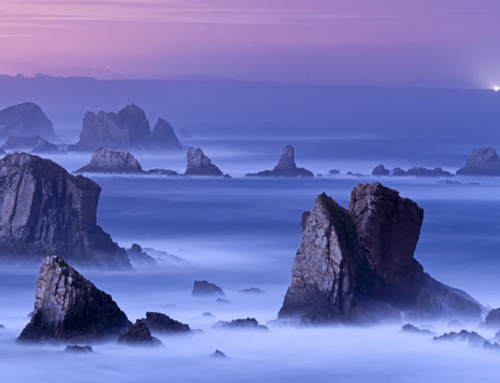
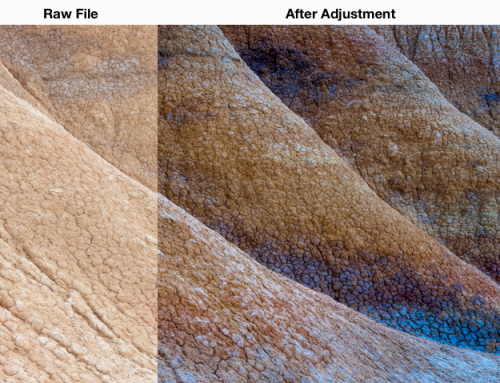
Regardless of which RAW conversion software you use, the principles are the same and the emphasis should be placed on why you are making certain adjustments as much as how you make them.
Lightroom shares the same tools and algorithms as Adobe Camera Raw, which came packaged with earlier versions of Photoshop with the Bridge component.
Adobe Lightroom acts as an image importer, organizer, keyword directory, image rating, meta-data search engine, powerful raw file processor and offers a range of output options including web, slide-shows, web pages and even books.
In most cases it is now a one-stop-shop for nature photographers.
IMPORT & ORGANIZE
Image organization is a personal thing and we all have our own preferences, however, we outline some fundamentals below for those of you yet to find your perfect solution.
Folders – Lightroom works in Folders, with images subdivided within those folders by date. If you do not want this hierarchical structure you are best to transfer your image files from the camera to the specified folders on your hard drive and then add them to Lightroom.
Locations – When you have a few hundred images organization seems trivial. By the time you have 100000 images, getting them into some kind of order would take weeks.
Our personal preference is to import images into Lightroom copying the files direct from the camera card to a specified database hard drive. If we have a specific folder for a location (e.g. Iceland) new Iceland images would go in there. Otherwise, you can simply create folders for Year and Date and use Lightroom to create categories that act as virtual location folders.

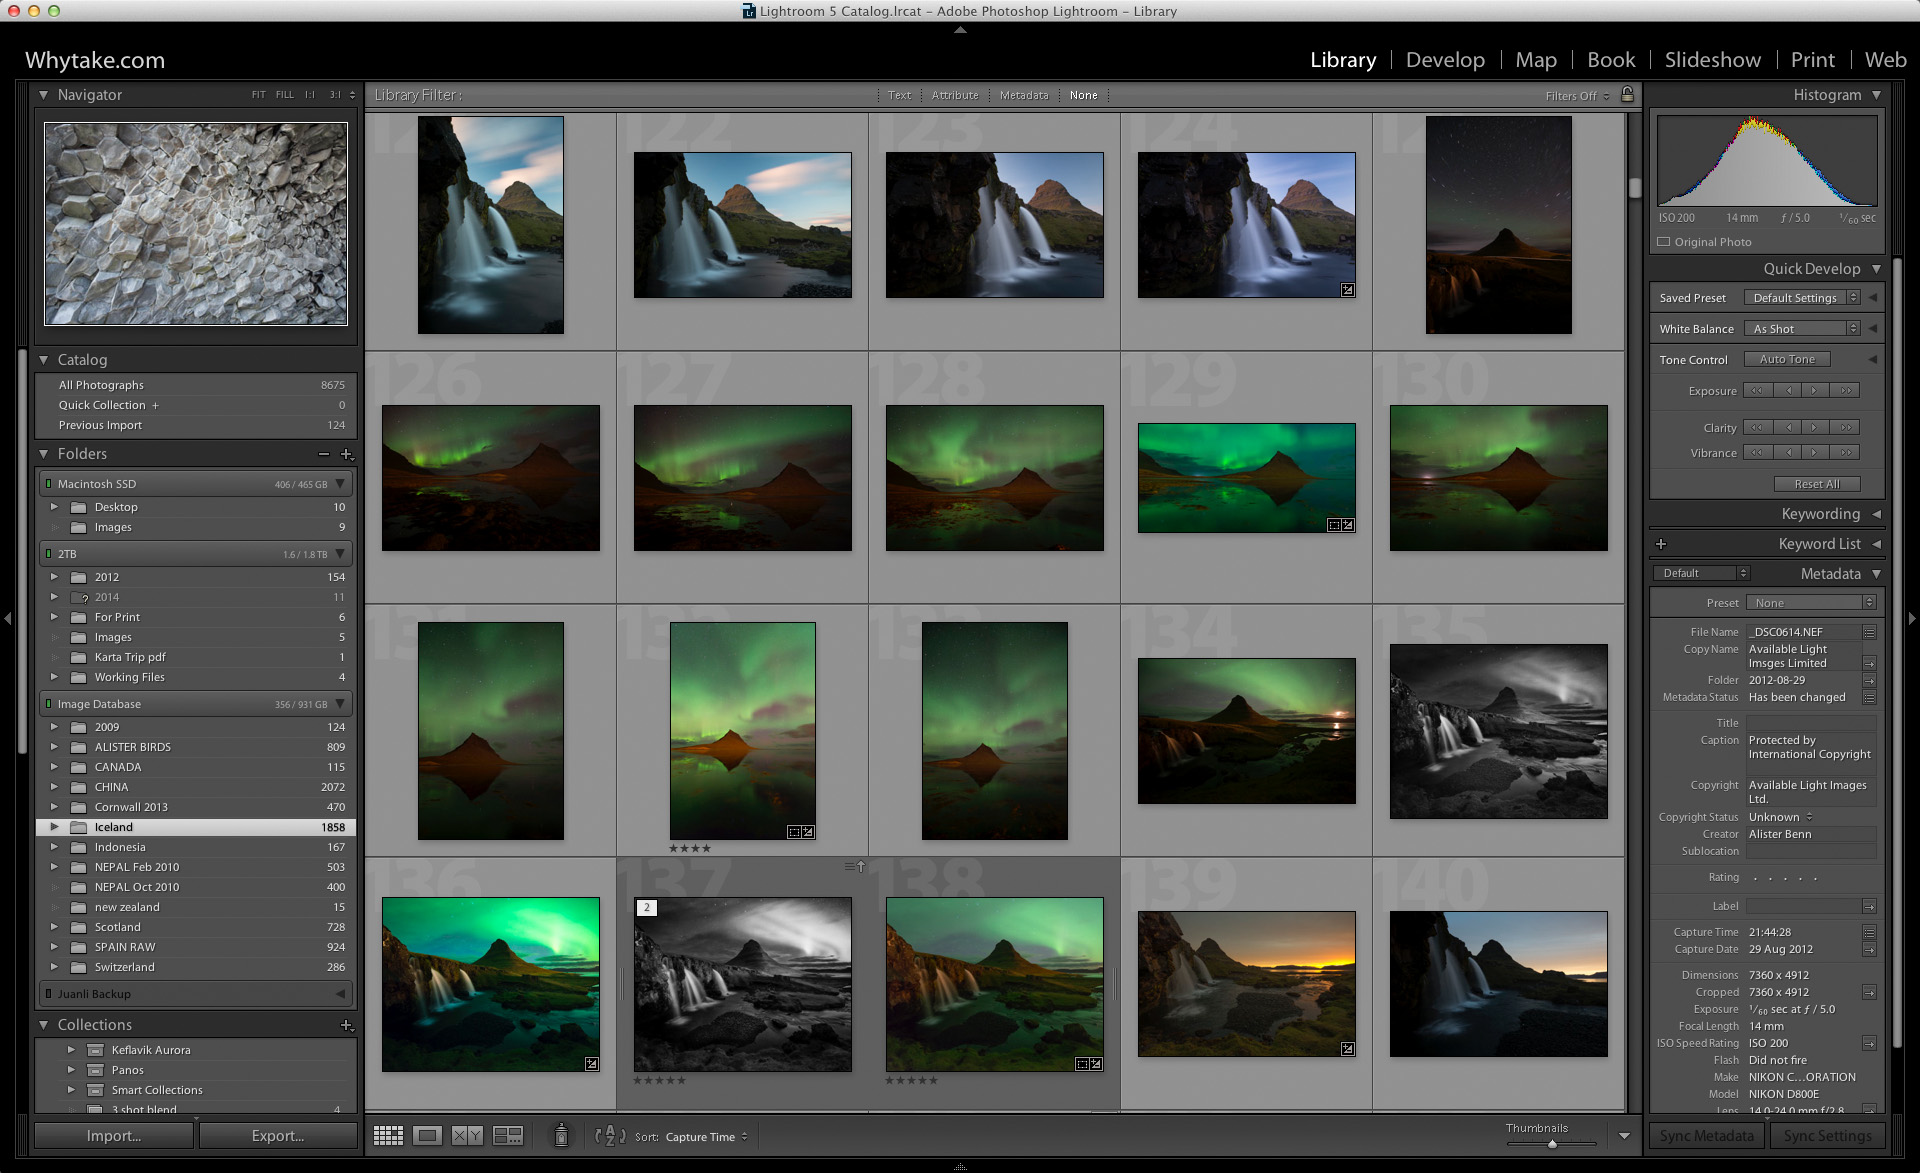
THE WORKSPACE
The Library – This is the organization, previewing, rating and tagging module within Lightroom. Once uploaded, images can be graded between 0-5 stars or flagged with different colors. They can be searched and filtered by Meta data and keywords.

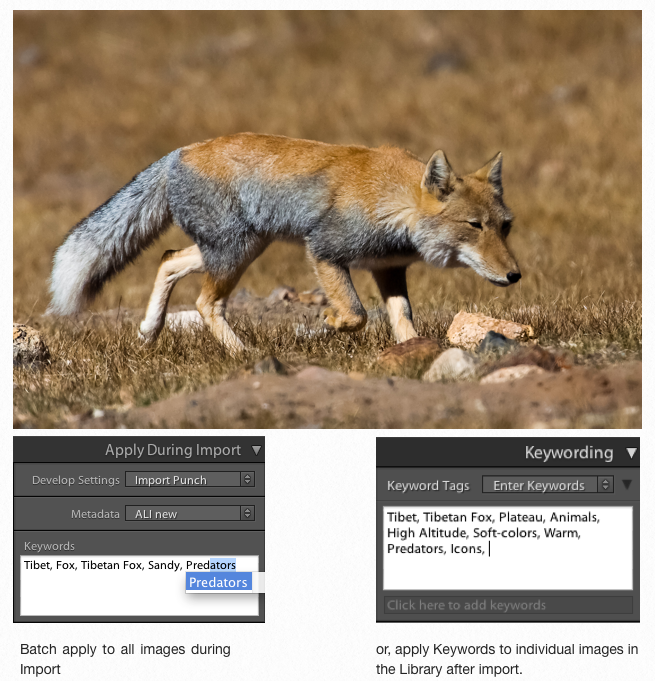
Keywords – Most people are familiar with the concept of Tags on websites & blogs – a way to filter posts or content by certain words. Keywords are the same – for each image you can add a selection of Keywords – that then become a search-able database of filters – allowing for example, all images that have been tagged Tibet – to be displayed in a single selection, regardless of where they are in your image catalogue.
Collections – Working with Collections has even further benefits.
There are two types of Collections – Regular and Smart. Regular Collections contain images that you choose to put in them. Smart Collections are automatic based on a set of rules you define when you Create a Smart Collection.
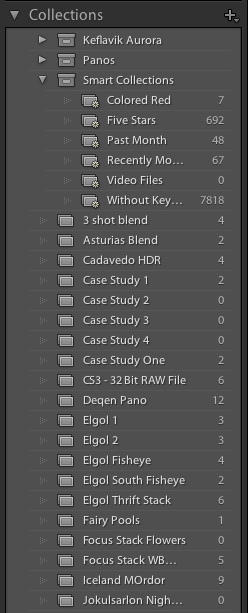
Order – In Regular Collections you can rearrange the order of the images by clicking and dragging on them – in Smart Collections, the order is fixed.
Avoid Duplication – A truly key aspect of working with collections is that you can have an image in as many collections as you want, but it is only stored in the catalogue from its original location. A collection simply points to the image.
Three Smart Collections – Lightroom automatically creates three smart collections for you.
Recently Modified – contains images you have been working on recently. You can change the period of time it looks at by right click and edit smart collection. The default is 2 days.
Past Month – contains images you have taken in the last month.
Without Keywords – A little reminder from Lightroom that you have yet to keyword your images!
Export for Web
For many, the quick steps outlined in this tutorial will be sufficient for them to quickly and efficiently make the most of their images. One of the most common final steps is to save the images for display on the Internet.
In Lightroom, a right click on the image will display a drop down menu, one option of which is Export.
There are various tabs, but the key ones are shown above.
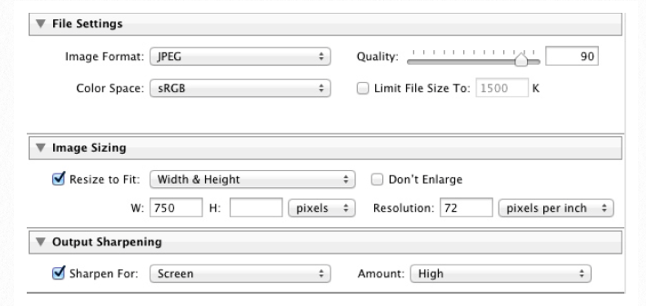
File Settings – Files can be exported in various formats, but for web display, jpeg is the most economical on size and speed.
Quality of 90% is perfectly adequate and will deliver high quality while still reducing file size. sRGB color space is the most suitable for web display.
Image Sizing – specify a width or a height.
Output Sharpening – a little subjective, but sharpening for screen at high or normal is usually fine.


