We are all unique; we all see the world as only we can see it – our perceptions, beliefs, visions, motives and expressivity are all our own. Equally, our abilities to spend time in the field vary, with some limited to a few short moments at the weekend, after work, or on family vacations. The landscape and nature work to their own agendas; the sun rises and sets, weather systems come and go, atmospheric pressures rise and fall, as do the tides and the passing of the seasons. In short:
Do not expect nature to deliver the perfect conditions for the image you want to create at the time you want to make it.
For years I used to measure the success of a photographic trip into nature by the images I made, and if I failed to make the image I had in my head prior to leaving the house, I would return home deflated and somehow resentful that nature had somehow let me down!
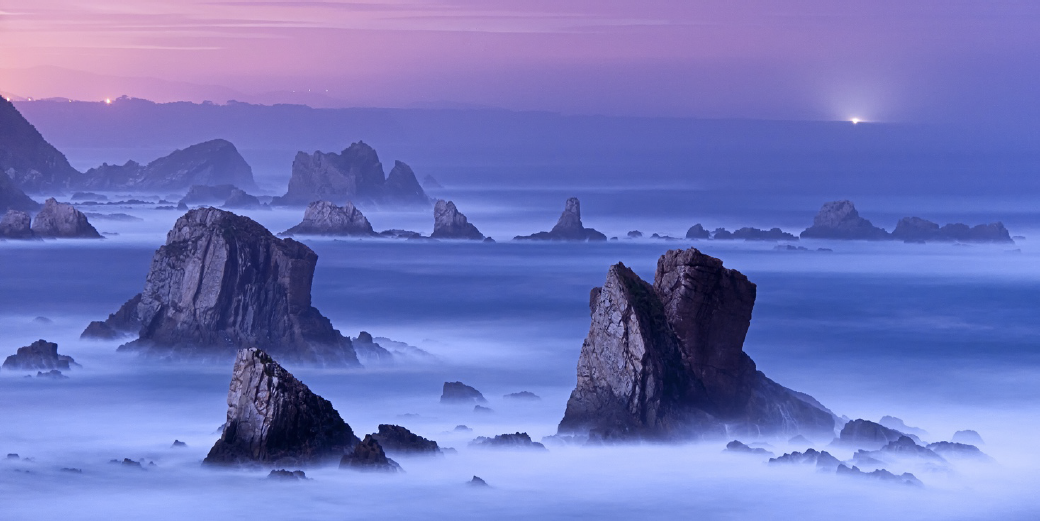
Now, I live by a far simpler mantra – Shoot what is there in the available light.
Before we know it, we have found the first reason why we can shoot black and white images:
You can make successful mono images in ANY light.
Color is the subject in so many landscape images – often-poor compositions are compensated for with the saturation slider – adding wow and punch to the greens and reds to shock the viewer into a state of submission!
In black and white, the graphics and composition of the image are so vital, it tests the photographer – forcing them to be articulate and clear about the subject, lines of flow and balance.
Suitable Light for B&W
Some lighting conditions that are excellent for black & white Photography include:
-
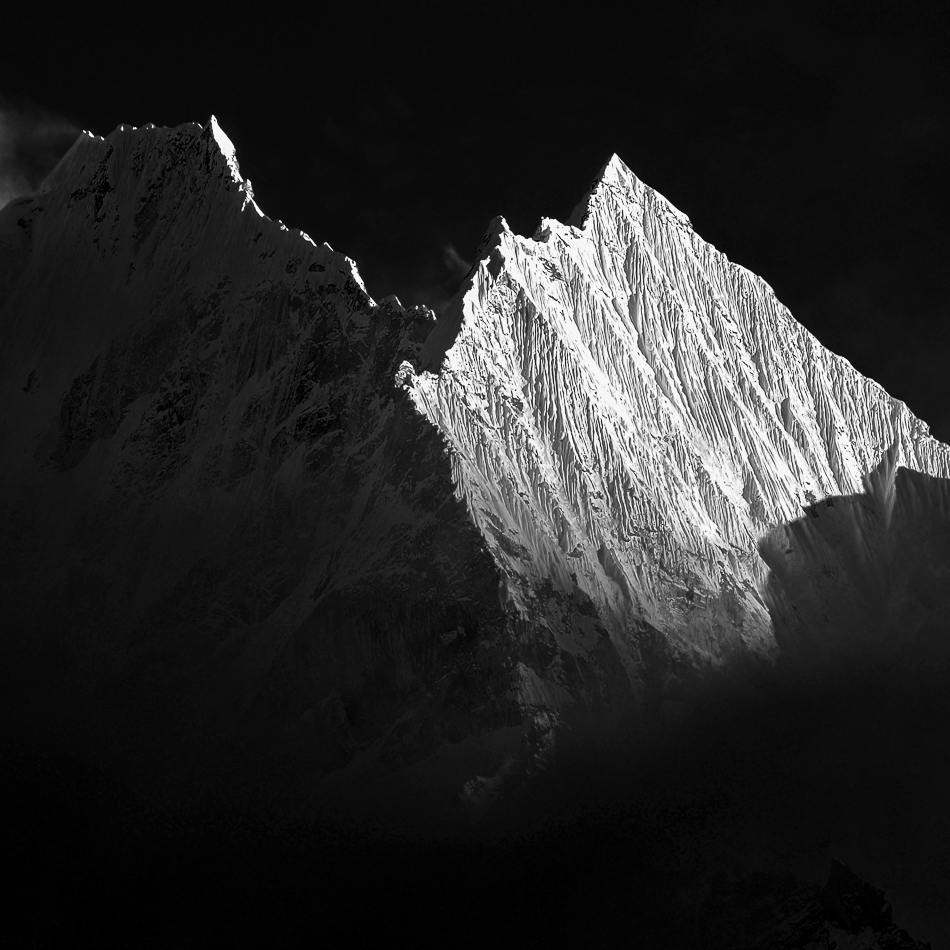
Harsh directional light
-
Soft light under heavily textured cloudy skies
-
Fog
-
Silhouettes
-
Uniform skies with no textures
-
Side light on heavily textured surfaces
If you read between those lines, what we are saying is – many situations that people would consider non-conducive to landscape photography are ideal for making black and white images.

How many variables had to align for this image to be made? Weather, tides, season, time of day, opportunity, creative vision, technical capture and processing technique – to name a few.
Suitable Subjects for Black & White
We could be forgiven for being comical and saying – anything! But, some subjects do lend themselves to mono photography.
These include:
-
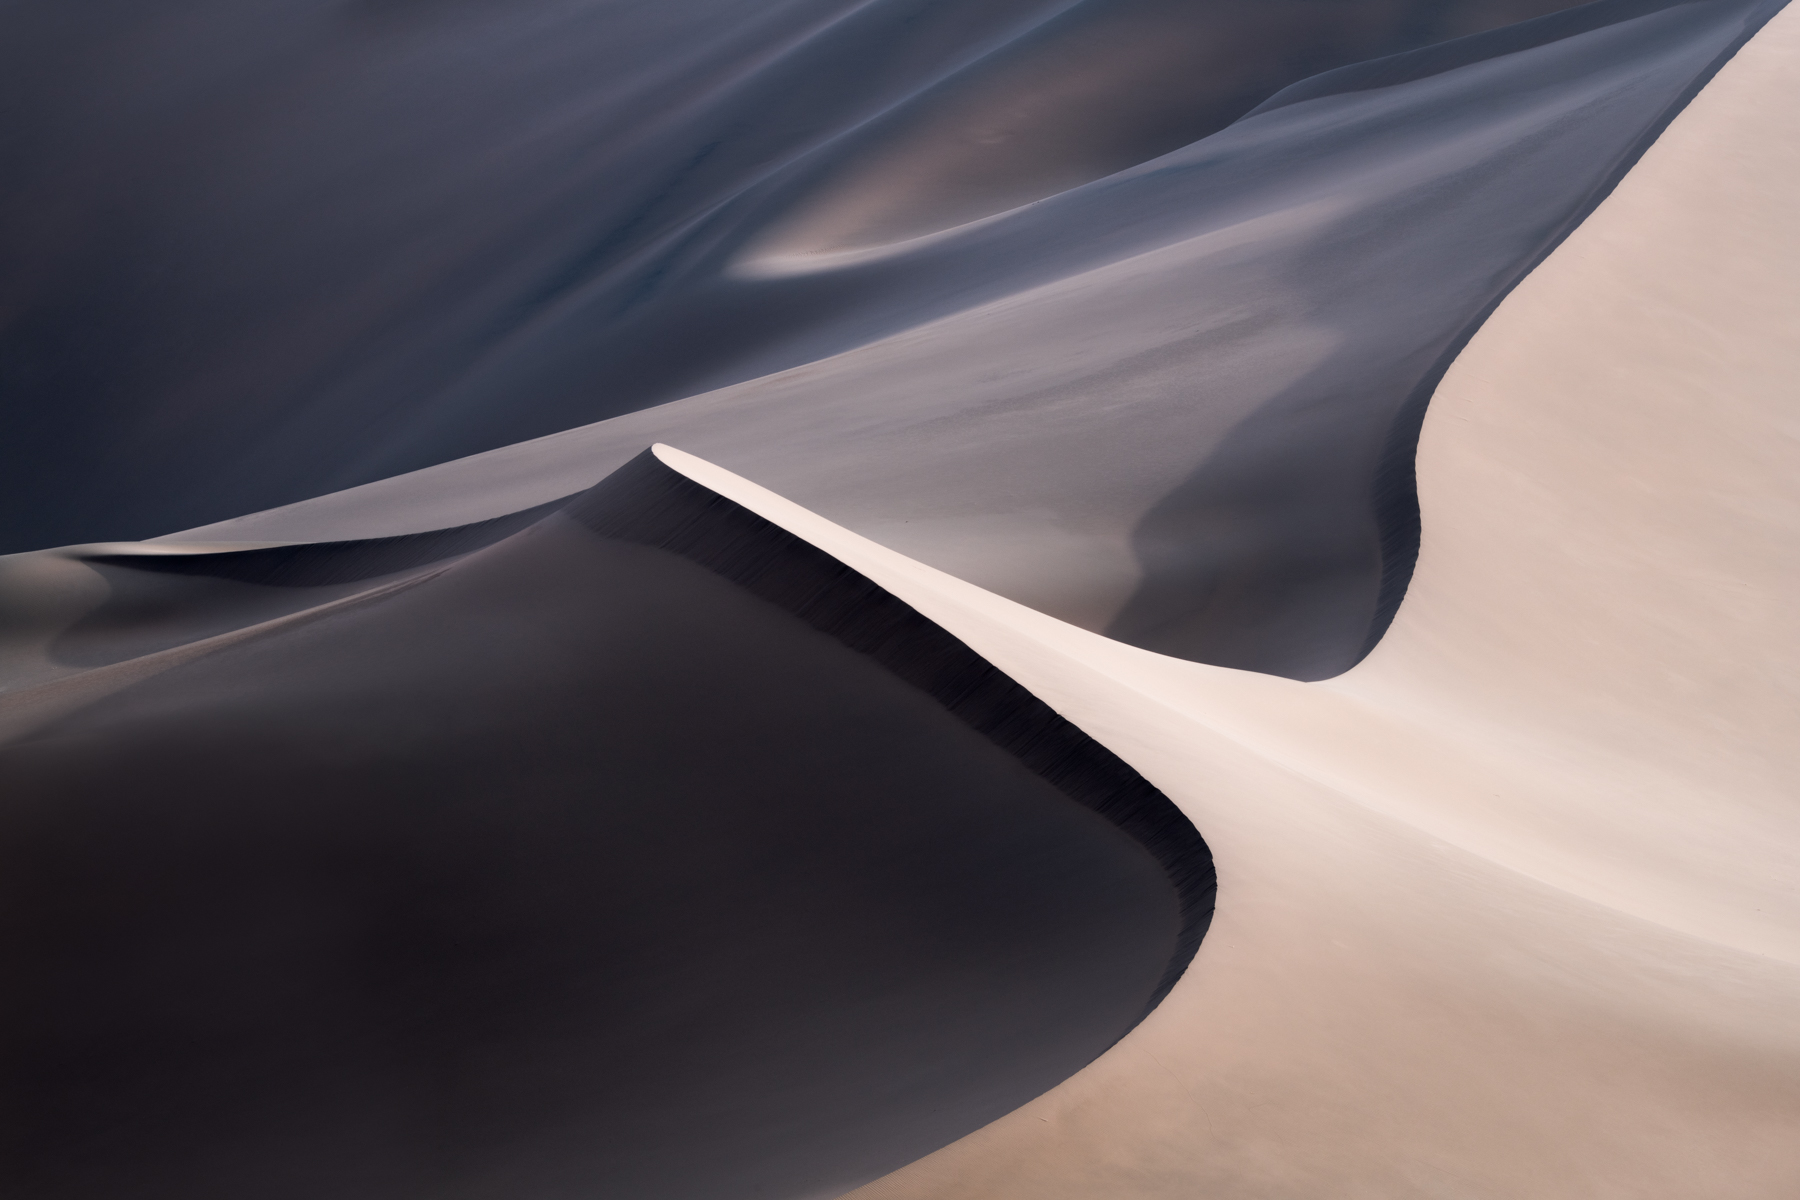
Strongly Graphical Elements
-
Scene full of tonal contrast
-
Moody scenes
-
Monochromatic subject matter
-
Raw natural elements such as Rocks
Ultimately, the choice of subject is a very personal thing; as you choose to shoot what stimulates you and help you make some form of articulate statement about that place and yourself.
Suitable Intent for Black & White
If you sit a painter down with a blank canvas in front of a landscape – they decide where to paint, how to paint and why to paint – every brush stroke has intention.
While landscape photographers may not have that degree of creative license, we can still decide what to include in the frame and very much how we want to post-process that image – we have plenty of opportunity for intention – it is just that most choose to let the cameras or computers make creative choices for them!
By stripping our images of color, they can in fact be more expressive – as they lend themselves naturally to some, or all of the following Intentions:
-
Timeless Character
-
Ambiguity
-
Mood & Mystery
-
Departure from Reality
The whole genre of fine art photography rests on the shoulders of mono images, from cityscapes to bridges, architecture, lilies, portraits and of course landscapes. It is almost as if by stripping the world of color, the viewer truly sees it for the first time as a graphical series of shapes and tones.
Pre-Capture Visualization
Looking is not the same as seeing – when we enter the landscape with a camera in our hands, more often than not we do not consider the image we are going to make – instead we become engrossed in the place and our reaction to it. We see a nice scene and raise the camera to record it. Later, at home, we can reflect and measure the success of our images by comparing them to the memories of the event.
Our viewers do not have that luxury of comparison; they get what we give them! Intention again.
Our photographs are better by design; they are improved when we have a clear vision of what we want to shoot and how we want to present it to the viewers.
Black and white images can be visualized after the event, at home in front of the computer. We can select an image that is graphical, simple or naturally muted – perhaps when we were shooting in poor light, or in the middle of the day. Most DSLR’s come with software that allows for mono processing and there is always Adobe Lightroom, which has an amazingly powerful array of creative tools.

Top 10 Tips for Seeing in Black and White
-
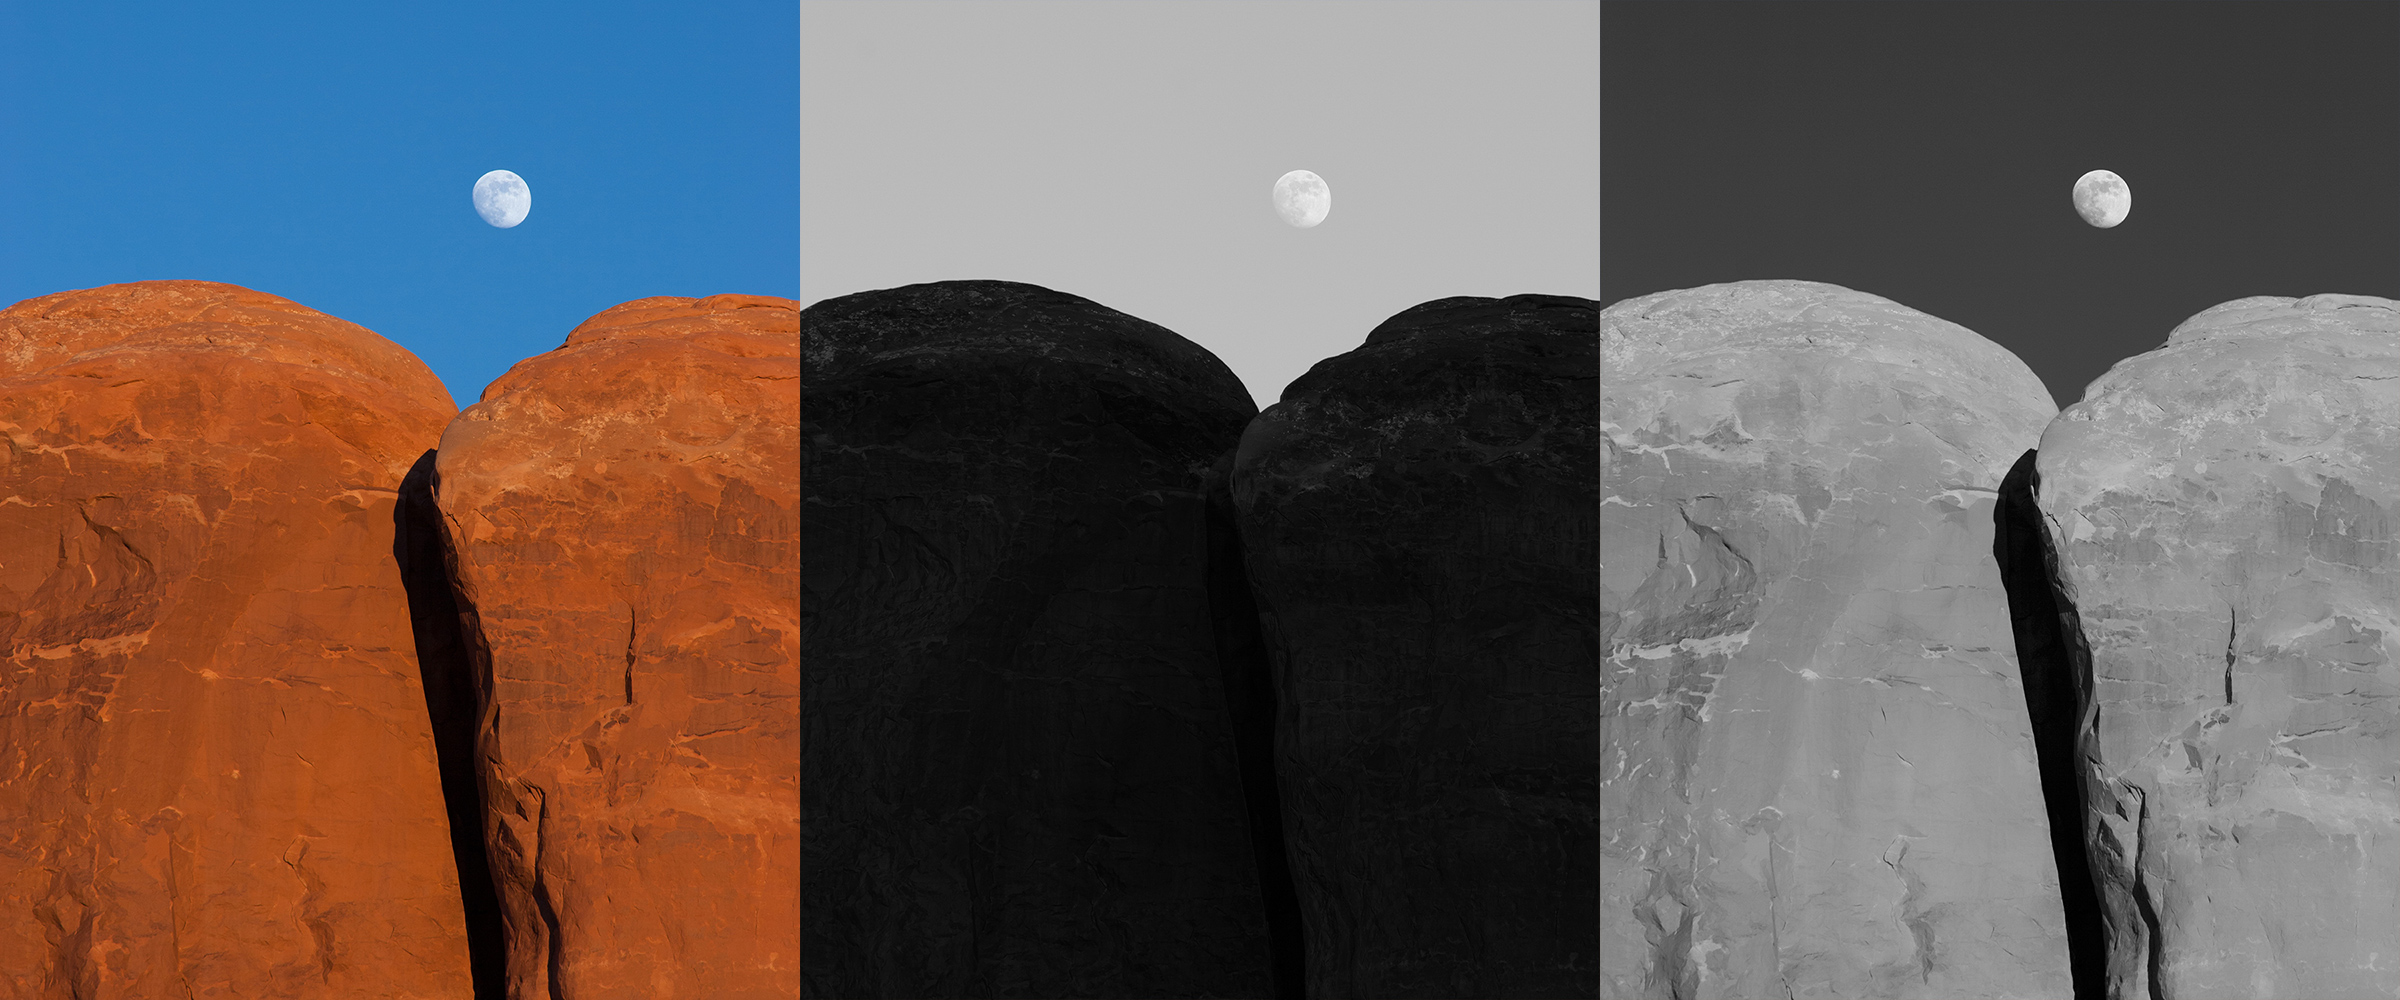
If possible, set your camera to monochrome and then all your previews will be stripped of color. If you are shooting RAW, the color information is still recorded – if you still shoot jpeg, your images will now be in black and white.
-
Experiment with the color filters in your DSLR mono settings. Shoot the same scene with a blue filter, then a red filter, then a green filter. The more colorful the subjects (blue sky, red rocks, green grass etc) – the more dramatic the differences will be.
-
Start looking for shapes in the landscape – Triangles, squares, circles – stop seeing the world as a selection of subjects. Stripping the landscape down to geometry is an excellent way to understand the interaction and relationships of elements within the frame.
-
Remember that the frame is a shape – Four straight lines making up a square or rectangle. How subjects converge with these four lines is a key to simplicity and articulation.
-
Find the flow – This is easy if there is flowing water in the scene, but if not, where is the eye leading through the frame – is there a natural route, or is there something blocking the flow?
-
Find simplicity – Black and white images are not the same as color images – you can get away with a lot more negative space in mono. One single rock, or subject in a field of negative space can be powerful.
-
Consider investing in a Neutral Density Filter. Something like a 10 stop ND Filter allows you to take long exposures of tens of seconds in the middle of the day. This is ideal for rendering the moving ocean as a mist of regular tone. Super for creating ethereal images full of calmness and isolating key subjects.
-
Begin approaching post-processing as a creative process. Use the interface to try images with high or low contrast, brighter or darker. How does the mood change?
-
Go in to the landscape without expectation – shoot what you see and react to, not what you hoped to shoot.
-
Invest in your development – take to time to read and think about what you want your images to say and then work on the techniques necessary to realize that vision